Subscribe to our Newsletter!

Sunday, March 30, 2014

The Curiosity Cabinet and a Gallery Wall

vintage silver, curiosities, starfish, pewter, handmade cabinet

I love old curiosities...don't you?  I'm not talking about freaky, weird things like they made the TV show about.  I mean everyday things, old books, old coins, starfish, rocks...things like that.

Years ago, my husband built this cabinet for me using an old window.  I love, love, love it.  It's simple but has always been one of my favorite pieces of furniture.

starfish, seashells, rocks


I began filling it with old books and I liked the way it looked.  They seemed to be meant for each other.  As time went one, I added other "old" pieces.  Tarnished silver.  An old brass ship.  Pewter goblets.  And I just kept filling.


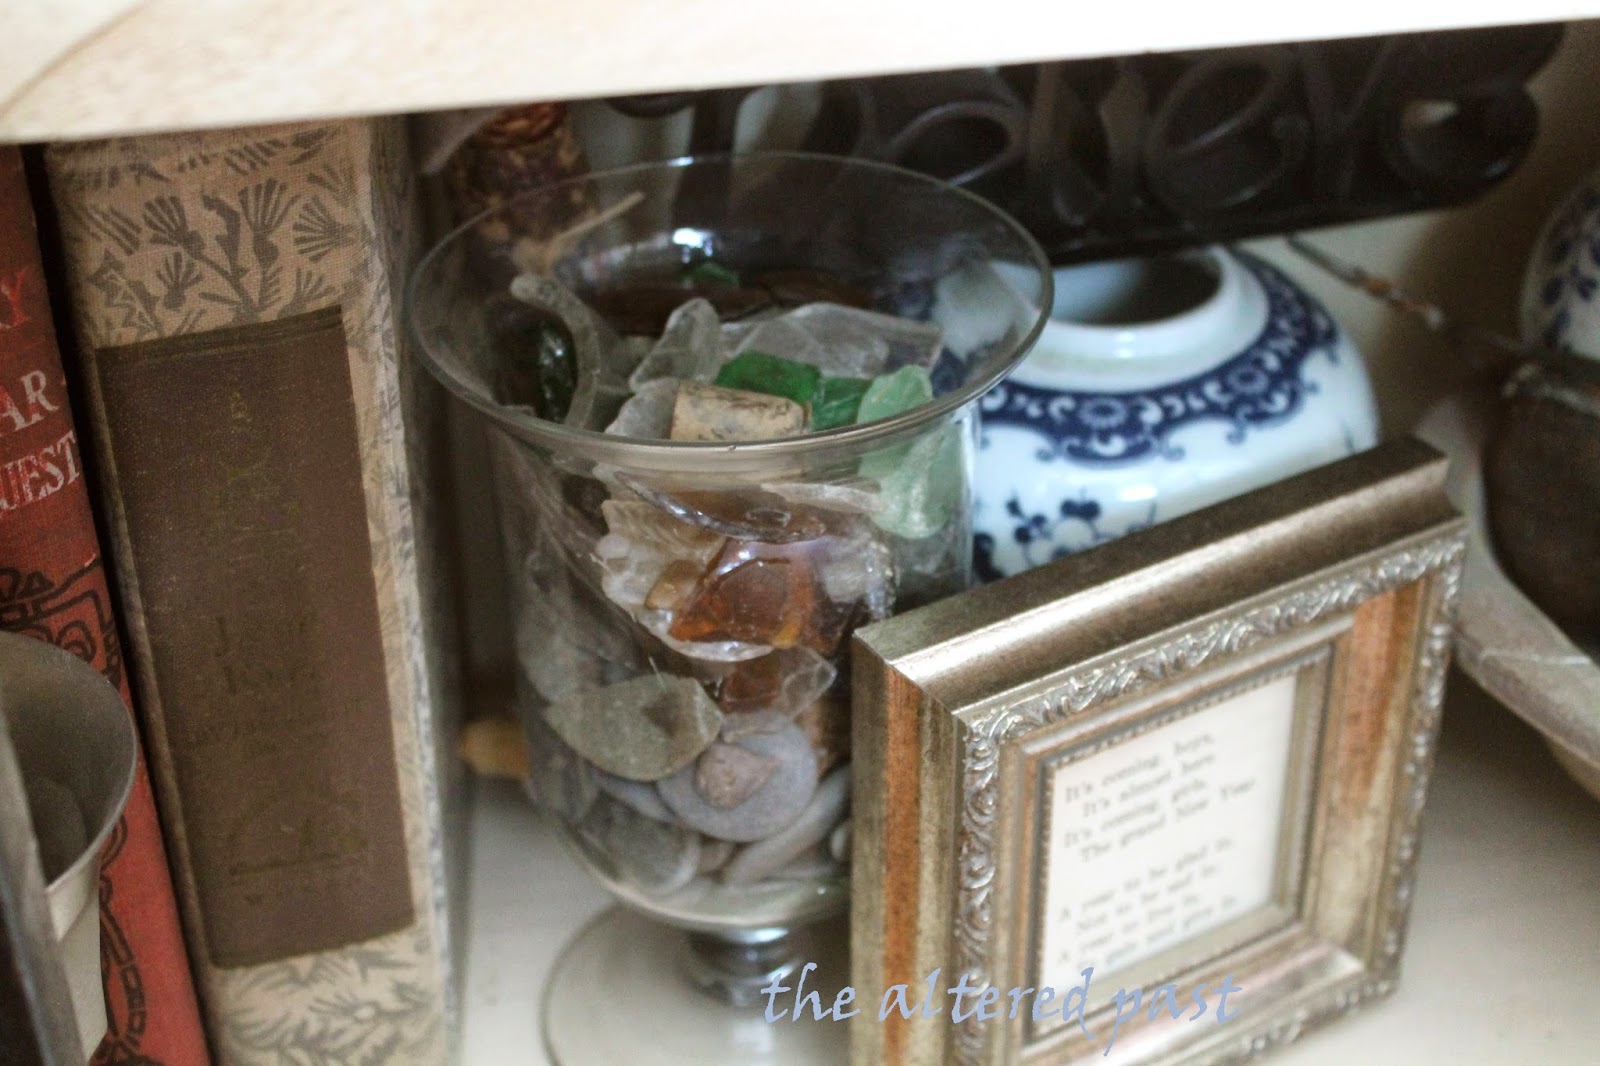
The vase hold river rocks and river glass.  (I'm from the foothills of the Smokies and I love river rocks. 
These all came from the Little River in Townsend, Tennessee.)


The rock piece with a hole was found in the creek bed at the back of our property.
I believe it is part of an Indian artifact.  The other rocks have shell fossils.


It even spills out on to the top.  Old bottles found at my grandfather's farm.  Foreign coins.  Pennies flattened on the railroad tracks.  An old globe, minus the stand.


I left you hanging a while back when I posted about my gallery wall of vintage maps.  This is the wall above the cabinet of curiosities. You can see that post here.  I had most of the wall done except for the upper left corner.  I needed something for that spot.  Well, I did finish that wall finally.  I found the right size frame, painted it black, and added a vintage map of the State of Tennessee.  I think it fit perfectly.


Thanks for stopping by today and God bless!
Angie


I'm linking here:
THE STYLE SISTERS


STONEGABLE

UNDER THE TABLE AND DREAMING

Thursday, March 27, 2014

Faux Oxidation Technique

faux oxidation technique


I've owned this huge black lantern for several years now.  I thought I loved it but as the years passed, I've grown to just like it.  I couldn't understand why.  I drool over the lanterns on the pages of Restoration Hardware's catalog.  I already own a lantern.  Why do I not love it anymore?

Whew! That's a bad photo, but you get the gist of the flat black look of the lantern here.


Cue the "light bulb over the head" moment...it's too new looking!  Too flat black.  Too meh for me now.  It needed some aging.  Something that said "I've got a history, I've been around for a while."  That's when I began toying with the idea of adding the look of oxidation to the metal.  You know, that powdery white patina that happens to metals that have been outside for a l-o-n-g time.


Use a lot of water and little paint.  Allow paint to run and even puddle on the edge.

This is what I came up with.  It's similar to using a dry brush technique EXCEPT you do not want to use a dry brush.  The brush must be wet, loaded-with-water wet.

I didn't do anything to the lantern to prep it for this but a good wipe with a damp cloth never hurts to remove dust or any oily residues.


I chose a light gray craft paint.  Use a plastic tray or plate to mix your paint and water.  With your brush loaded with water, grab a little gray paint on the brush and slightly mix on the plate.  Next, begin painting the lantern.  If yours has any curved areas, like the top of mine, be sure to paint in the direction of the curve.  It will help the oxidation look more natural.


Top done.  Bottom still flat black.

This may take a couple of coats.  The paint will pool at the bottom edges of the lantern.  That's okay.  If there is too much color pooled at the bottom, simply use your brush to pull some of the paint back up.

The more coats you add, the more "oxidation" look it will have.


I stopped at 2 coats.  I wanted you to be able to tell the original color was black under all that oxidation.


So, here it is all aged and beautiful.  I've not found the perfect spot for it yet.  I'm kind of bored with the vignette inside.  Hmmm...the wheels are turning.  I'm thinking ironstone and wooden utensils would look great in it for the kitchen island!

Thanks for stopping by and God bless!

Angie

I'm linking here:
THE STYLE SISTERS


STONEGABLE

UNDER THE TABLE AND DREAMING

Friday, March 21, 2014

Pancake and Chocolate Syrup Recipe

Since I whetted your appetites with the post about Birthday Breakfasts, I thought I'd answer your questions on how to make the incredible (and incredibly simple!) Homemade Chocolate Syrup and how to add more flavor to your basic pancakes.  So, here we go.


First for the pancakes, you begin with a simple baking mix.  I don't like to see a bunch of ugly boxes sitting in my pantry so I use old pantry jars to hold most dry goods.  If you need the measurements for biscuits, pancakes, etc., just copy it from the box and taped it to the jar.


Did you know that most old teacups hold exactly one cup?  That makes them perfect as scoops in flour and sugar jars.  And, the look nice too.  This one is a vintage Homer Laughlin teacup.  I assume it was made for a restaurant or hotel because of the JC monogram. 


Here are the other ingredients for the pancakes.  It's a pretty basic, by-the-box recipe except, for more flavor, I add a splash of maple flavoring.  I also substitute part of the milk with flavored creamer.  If the recipe calls for 1 cup of milk, you can add 1/2 cup milk and 1/2 cup of creamer.  When I substitute with creamer, I do not add any sugar that the instructions list.  Flavored creamer has enough.


Mix well!


Here's a pancake trick that I picked up from Julia Child's cookbook.  Let the batter rest for a few minutes before pouring it in your pan.  You can see in the photo above, there are a lot more air bubbles in the second photo than the first.  Those bubbles will help make fluffier pancakes.


Whether you're using a pan like this one (which I happen to think is the bomb-diggity for making pancakes) or a griddle, always preheat it before adding your batter.  Otherwise, you batter will continue to spread and your pancake will be thin instead of thick and fluffy.


Enough with the pancakes, you're here for this!  Hot, chocolaty syrup!  I didn't take a picture of the ingredients but they are very basic.  Here's what you'll need:  1 1/2 cup water, 1/4 cup cocoa powder (I just use store brand or whatever may be on sale), 2 tablespoons of butter, and 1/3 cup of sugar.  Put everything in a saucepan and gradually heat to a slow boil.  Once it begins to boil, turn the heat down to simmer.  I like my chocolate syrup thin so that it saturates the pancakes.  If you would like it thicker, you can add a little bit of cornstarch before the boil.  But I wouldn't...just saying :)

So we've got everything prepared.  Let's put it all together.


Mmmm....hot buttery pancakes.  Just waiting for the chocolaty goodness.


Are you ready for this?


Ok. Here goes!


Oh my goodness...hurry up!


Wow, if your screens were scratch and sniff, you'd be envying me about now.


That will just about do it!  See the chocolate syrup puddled around the pancakes?  That's when you know you've got enough on there.  It won't stay a puddle for long.  It's going to soak right into those pancakes, making them incredible!

Oh my!

I hope you get a chance to try these and you'll know what I mean.  I normally eat pretty healthily but, hey, birthdays are special and come once a year.

Tomorrow I'll eat some yogurt but for now...


Stick a fork in me.  I'm done!

Thanks for stopping by and God bless!
Angie

Wednesday, March 19, 2014

Celebrating Birthdays


Around our house, we begin our birthday celebrations at breakfast.  Today is my oldest daughter's 23rd birthday.  Wow, she's 23, when did that happen??


This tradition began years ago when I found this adorable tea cup and saucer.  


Shortly afterwards, I found this cute plate.  It just screamed party to me when I saw it.  So, I grabbed it up and added other pieces to the celebration dish family.  Since we usually go out to eat for the birthday dinner and wouldn't be eating at home to use the dishes, I decided they would be perfect to use for breakfast. 


Before the big day, I ask the birthday girl what she would like for her birthday breakfast.  We have three daughters and, it's funny, each has their favorite combination but they all agree that sausage or bacon MUST be included.  

Another favorite request is biscuits with Mamaw's sausage and gravy.  My mother is an expert gravy maker as was her mother before her.  I'm learning.  I can't say it's always perfect but it's getting there.


This morning's request was pancakes with homemade chocolate syrup and sausage.  

Did you know that if you add a splash of maple flavoring to your pancake batter, they'll taste even better?  

Yeah, like pancakes need to taste even better.  Heaven help us.


There was also good ol' maple syrup on the table for those who may have been deprived as a child and never experienced homemade chocolate syrup on hot buttery pancakes.  

Sadly, they just don't know what their missing.  Let's have a moment of silence for them.  


Amen.


I'm pretty sure pancakes smothered in butter and saturated with hot, chocolate syrup is a little taste of heaven on earth.  

Just sayin' :)

Well, happy birthday to Number 1!  We love you and hope you're having a great day!

Thanks for stopping by and God bless!
Angie


I'm linking here:
THE STYLE SISTERS


STONEGABLE 

UNDER THE TABLE AND DREAMING

A DELIGHTSOME LIFE


Shamrocks and Daffodils


I don't know if it's because I'm so o-v-e-r winter or what but I'm just loving these colors right now.  I began my spring decorating with some of my blue and white dishes as you remember from this post.  Yesterday, we went for a walk to the old farm next door and collected these beautiful, bright yellow daffodils.  Add those to the blue and white and it's gorgeous.  Now, with St. Patrick's Day approaching, I picked up a pot of shamrocks at Kroger.  The vibrant green just makes the whole thing over the top WOW!  


The Latin name for shamrock is oxalis acetosella.  

This plant family also includes sorrel.  If you're a Seven Brides for Seven Brothers fan, you'll know that sorrel makes "real nourishing soup."  :)


Look at that yellow and green!  

I always thought a shamrock had 4 leaves...you know, a four leaf clover, luck o' the Irish kinda thing. Nope.  Shamrocks have 3 leaves.  Clover can have 4 or more.  Yeah, I googled that.


Vibrant yellow daffodils against the shamrock green.  

Did you know you can dry daffodils?  You can!  Just like hydrangeas, they will slowly over time become paper like but will retain some of their yellow color.  And like hydrangeas, they will be somewhat fragile.  Once mine are dried, I remove their stems and just used the blooms as a bowl filler or even carefully added to potpourri.  (Does anyone still use potpourri?)


Since it's St. Patrick's Day, I pulled out my old Atlas "Good Luck" jar for the daffodils.  

It's a little hard to see but this jar has a four leaf clover and the words good luck on it.  I can't remember where I found this jar but it was more than likely a thrift store or yard sale years ago.


Thanks for stopping by and God bless!
Angie

I'm linking here:

THE STYLE SISTERS


STONEGABLE 

UNDER THE TABLE AND DREAMING


Monday, March 17, 2014

A Giveaway to the Atlanta Home Show

Who loves something for free??  Me!  Who loves anything and everything to do with homes??  Me!  Well, this weekend is the Atlanta Home Show at the Cobb Galleria Centre.


The 36th Annual Spring Atlanta Home Show
March 21-23
Cobb Galleria Centre 


Special appearance Saturday by Ahmed Hassan of HGTV's Yard Crashers!  Yeah, how cool is that?!  I always hoped to run in to him in our home improvement store.  I've got a BIG yard that needs BIG help!  


The Atlanta Home Show is being sponsored in part by Hometalk!  Be sure to check them out for tons of great home decorating, gardening, building ideas, and more!


Now, here's your chance to enter!!